Since completing my MFA at AAU, it’s no surprise that I’ve enjoyed having a much less hectic schedule. What I haven’t enjoyed is the lack of creative direction it’s created – a bit of a void while I slowly start adjusting myself to “normal” life again after four years as a student. I’m getting the itch again – the need to create – but I want something new – something different and challenging. Although I have experience working with over a dozen alternative and historical photographic processes, this relatively niche field of photography is a veritable wellspring of inspiration with dozens more processes existing that I’ve barely ever heard of. It was time to dive in and learn more.
When I heard about my mentor, Christina Z. Anderson, and her whirlwind workshop tour of the Lower 48, I grew envious of the great potential that any of these various workshops could hold. My interest piqued, however, after hearing about a Portland-based workshop – nearly prohibitively far away from Alaska, but near enough to where funding may be able to be procured. Thankfully, within a few short weeks after hearing about it, I was able to procure airfare through UAF’s Summer Sessions faculty travel program to attend Chris’ workshop in not just one – but THREE – processes that I had zero experience with.
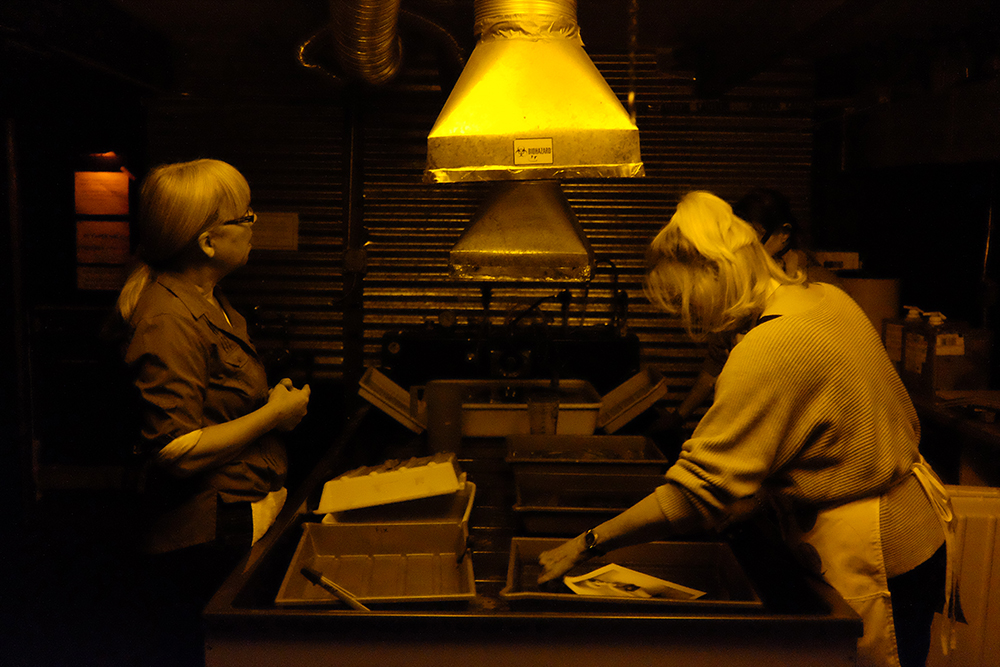
Initially, my main interest was in the Mordançage process – a process that would take normal fiber-based silver paper and “veil” the shadows of the image in much the same way that emulsion-lifted Polaroids do. My hope was that this process would not only send me enthusiastically back into the traditional darkroom but that it would also broaden my appreciation of “Wabi Sabi”. Perfected technique, variable squashing and predictable results defined much of what I sought for during my work on Stories Fading Fast – and, generally, I tend to be a bit of a control freak. I need to learn to let go.
My results with Mordançage wasn’t exactly what I expected, but definitely within my expectations: I’ll need to dive deeper into the process and play with it more until I figure out if I can find a balance between my control freak self and my desire to embrace serendipity. It was, however, overwhelmingly exciting to play with – even though the veils ended up being much more fragile than those of Polaroids and thus much harder to manage. That said, this was my first experience – and first results – and to come out with an image I’m proud enough of to share is quite impressive.
The second process was Chromoskedasic Printing – a process that silver plates all the light areas of the print – rendering the image into something that Christina likens to a “poor man’s Daguerreotype”. The only limited experience I had with this process was from a related process called Halo-Chrome; a particularly adventurous student of mine struggled with this self-taught process in one of my advanced courses and wasn’t able to find enough resources online to perfect the process. Chris, however, made Chromo printing easy and very accessible – in fact, I’m already looking up chemistry in hopes of ordering some soon. I see a lot of potential for Chromo in my work as a kind of what to “ease into” tintype by echoing some of the same visual cues – and to test out subjects for eventual tintype capture.
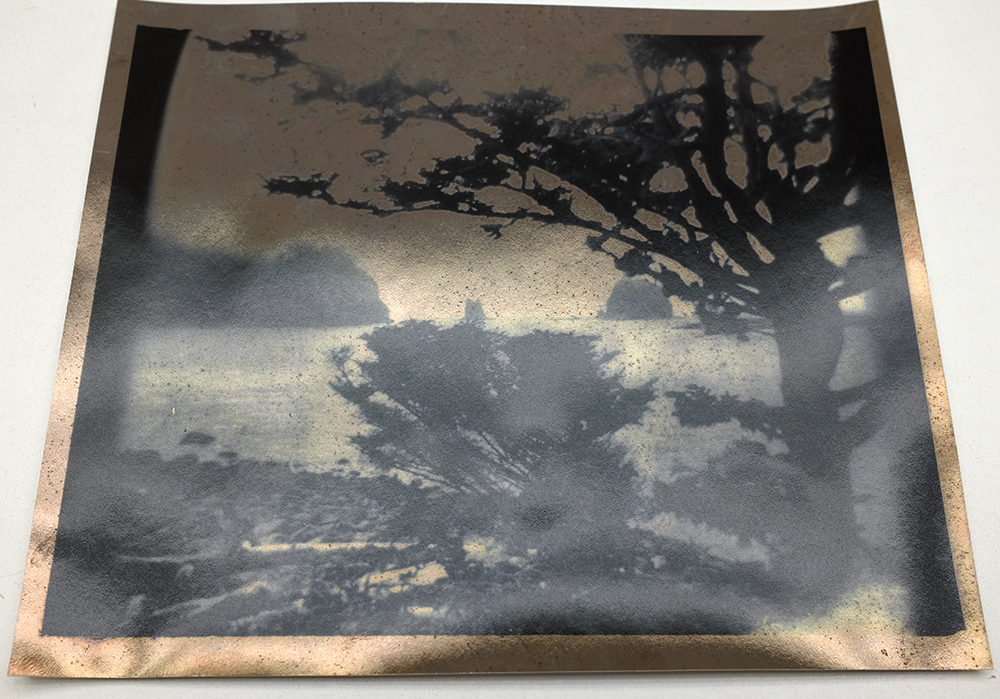
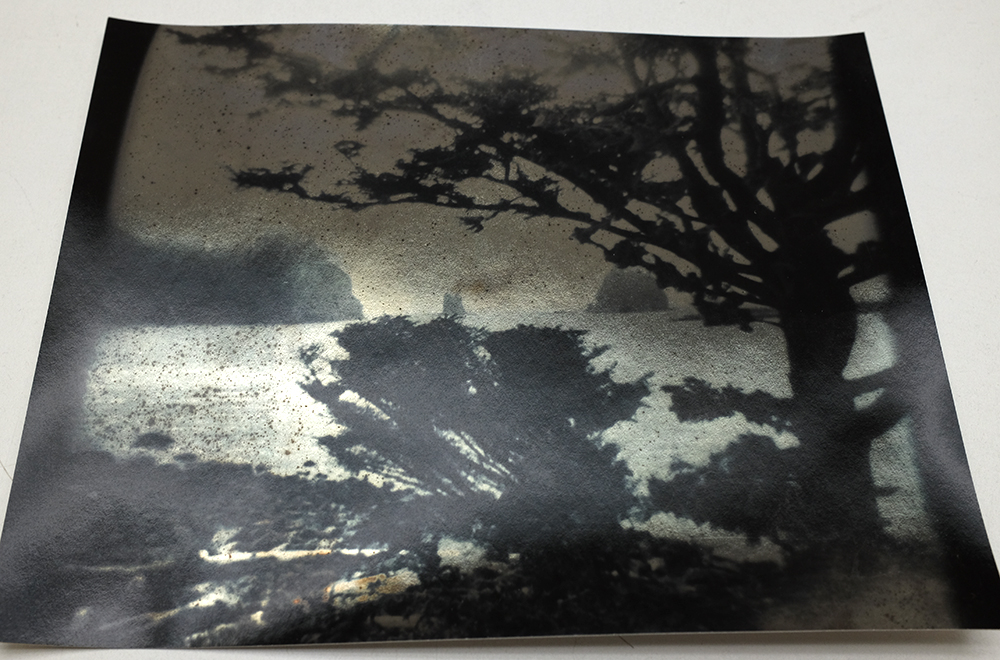
The only problem with Chromo printing is that it’s nearly impossible to render the prints digitally as they are in real life – the mirror-like surface does not reproduce very well, which is why I’ve presented the images slanted here.
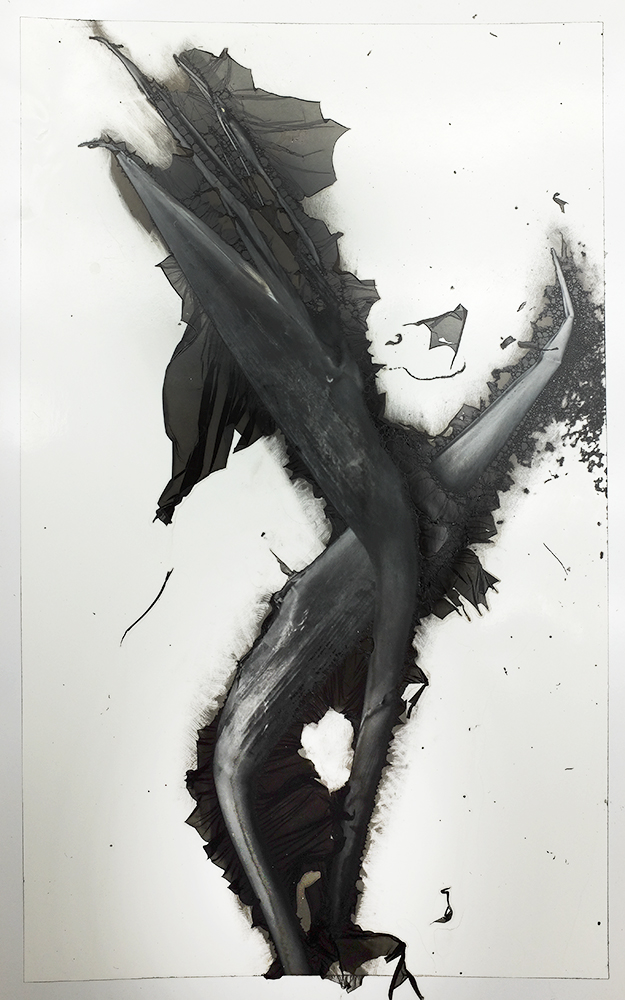
The third process – which wasn’t even billed as part of the workshop – was the Chemigram process. It joins the relatively few completely cameraless photographic processes I know and, quite surprisingly, became my favorite process out of the three. Abstract art – art purely based on formal elements – is a well-respected artform that I’ve always struggled at truly appreciating until recent years – so it’s especially surprising that I’d gravitate toward the Chemigram. This process relies on paper treated with some sort of barrier – in our case, acrylic spray, to coat and protect the paper from chemistry; this barrier is thinly cut open to reveal the surface of the paper and then alternated between developer and fixer as the barrier decays. The spray eventually begins to peel off – but not before creating elaborate patterns of alternating blacks and whites dependent on the originally cut-in design.
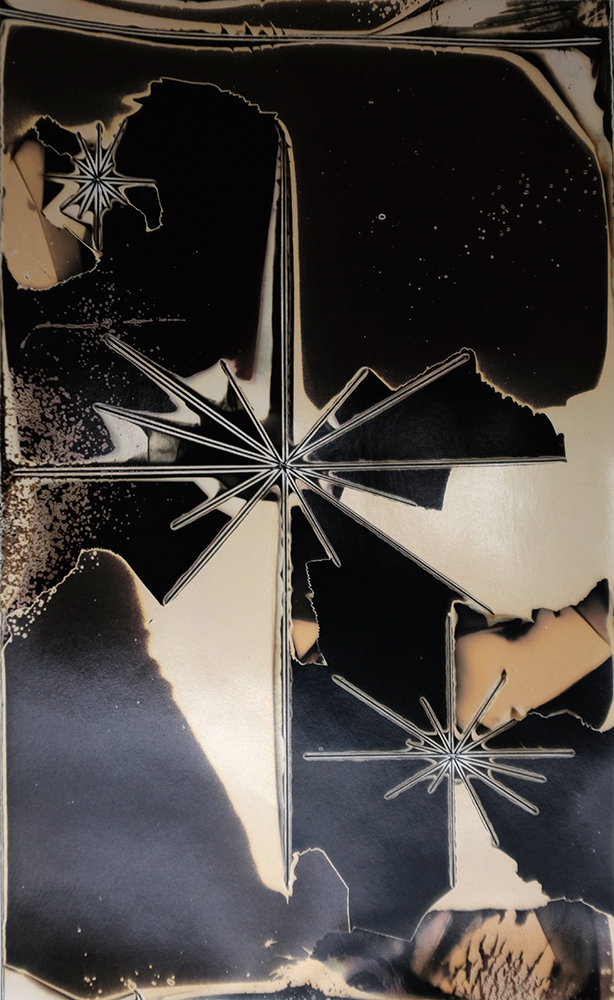
This process struck that ever-important balance between Wabi Sabi and personal control; although I controlled the initial pattern of the print and some of the elements of its progression, the way each individual layer peeled away from each designed cut was purely random. I marveled at the slow revelation of my final print like I did my first RC Print back in High School – it was equal parts magic and control. I think I’m in love.
In the coming weeks, I’ll be picking up this process for a new project I want to do – one that blends traditional darkroom negative printing *with* chemigrams. I’ll keep you all updated on my progress. This is an exciting time for me.
My trip to Portland was a cathartic release in many ways – not just photographically. I connected with artists, gallery owners, current friends and long-lost ones – as well as just taking in the PNW. I’m glad that I’m fulfilling a promise to myself made earlier this year: that even though my MFA studies have completed, I am still actively pursuing education. Learning fuels me.
Great story Jason!! And your prints look marvelous as I did not get to see them in Portland.
Mariana