For all of 2024, I hadn’t produced a single new Mordançage print. This is mainly due to the hassle of trying to obtain appropriate amounts of Copper Chloride in Alaska. Not being part of the contiguous United States makes it a lot harder to get these chemicals, but this time I connected with a local artist who had a ready supply of it and purchased some off of them. For those who have been following me on social media, you know that I spent seven weeks and 14,000 miles last summer hunting for photographs, many of which were destined to become new analog prints ready for mordançage. I’ve not only amassed a huge backlog of negatives to print, but also have a pretty healthy number of silver gelatin prints ready to go. This last week, I dove straight into the deep end, creating three new prints in a week. I’m sharing that work here while also sharing a couple nuggets of knowledge I picked up in the process of creating these that I haven’t seen noted elsewhere.
I’ve spoken before about how I’ve been able to bring old Mordançage solution back to life after six months to a year of sitting on the shelf, but this time I wanted to reduce my potential variables and start off with fresh chemistry. After mixing it, however, I kept on failing to produce any veils even though I had created the solution with a more-than-generous amount of 40% Hydrogen Peroxide. After adding nearly twice as much as I generally do, especially to start off a new batch of chemicals, I started considering all of my potential variables. Where had I messed up? Did I mix it up backwards, and would that matter? My Copper Chloride was fresh, I was using distilled water, but both my supply of gallic acid and hydrogen peroxide were old, purchased years ago. Could that be it?
A simple Google search revealed something that I should have been aware of: Hydrogen Peroxide loses its efficacy quickly and the 40% “developer solution” that I purchased several years back at a local beauty supply store was likely dead now. After purchasing some new Hydrogen Peroxide and immediately creating veils with the previously failed mixture, I’ll be sure to purchase a new bottle at least every six months. Perhaps this is an obvious one for those of you who make mordançage prints regularly, but I have not seen this particular issue mentioned in any write-up or book that I’ve sourced. As someone who routinely process hops and may not revisit a process for six months to several years, it is good to know which chemicals keep – and which don’t.

Starting fresh after a year lacking any practice with this process, I should have expected problems with my first print but after tackling the issue with the Hydrogen Peroxide and test stripping to ensure veils, I assumed all would be in the clear. My first print, seen directly above, was the result – and it’s probably best to categorize this as a creative attempt at salvaging a failed print.
Don’t get me wrong, I *love* how it turned out, but you’ll notice that it completely lacks the traditional veils that define mordançage prints. What happened? Well, it was a mixture of being overly excited at getting by hands dirty again *and* me getting distracted, failing to nurse the print as I usually do in favor of showing off the process to an alt-pro student. I turned down the pressure of the water in the wash after the bleaching process, which unintentionally cut the temperature to this bath. I’ve found that Ilford Multigrade Warm Tone paper tends to create the best veils at 80-90 degrees and that any lower inhibits veil production. Early on in learning this process, I had been told that colder temps made stronger veils, however, at least with this paper, that seems to be the opposite. Warmer temps on Ilford MGFB WT creates thicker, stronger, and more visible veils while colder temps create thin, wispy and fragile veils. While the print initially showed beautiful, pronounced veils, the lengthy 10-15 minute wash prior to redevelopment caused those veils to thin out so much they were almost invisible. They quickly broke up and slid off of the paper.
When this happened, I immediately started grumbling that the best of my three copies I had of this print was ruined by a simple, easily-avoided mistake. I started considering running another batch of test strips and running another print through, but then noticed the temperature of the water. I raised the temperature again and put another print in and lo, perfect veils. There was my culprit and it confirmed that those lower temps with this particular paper created weak veils.
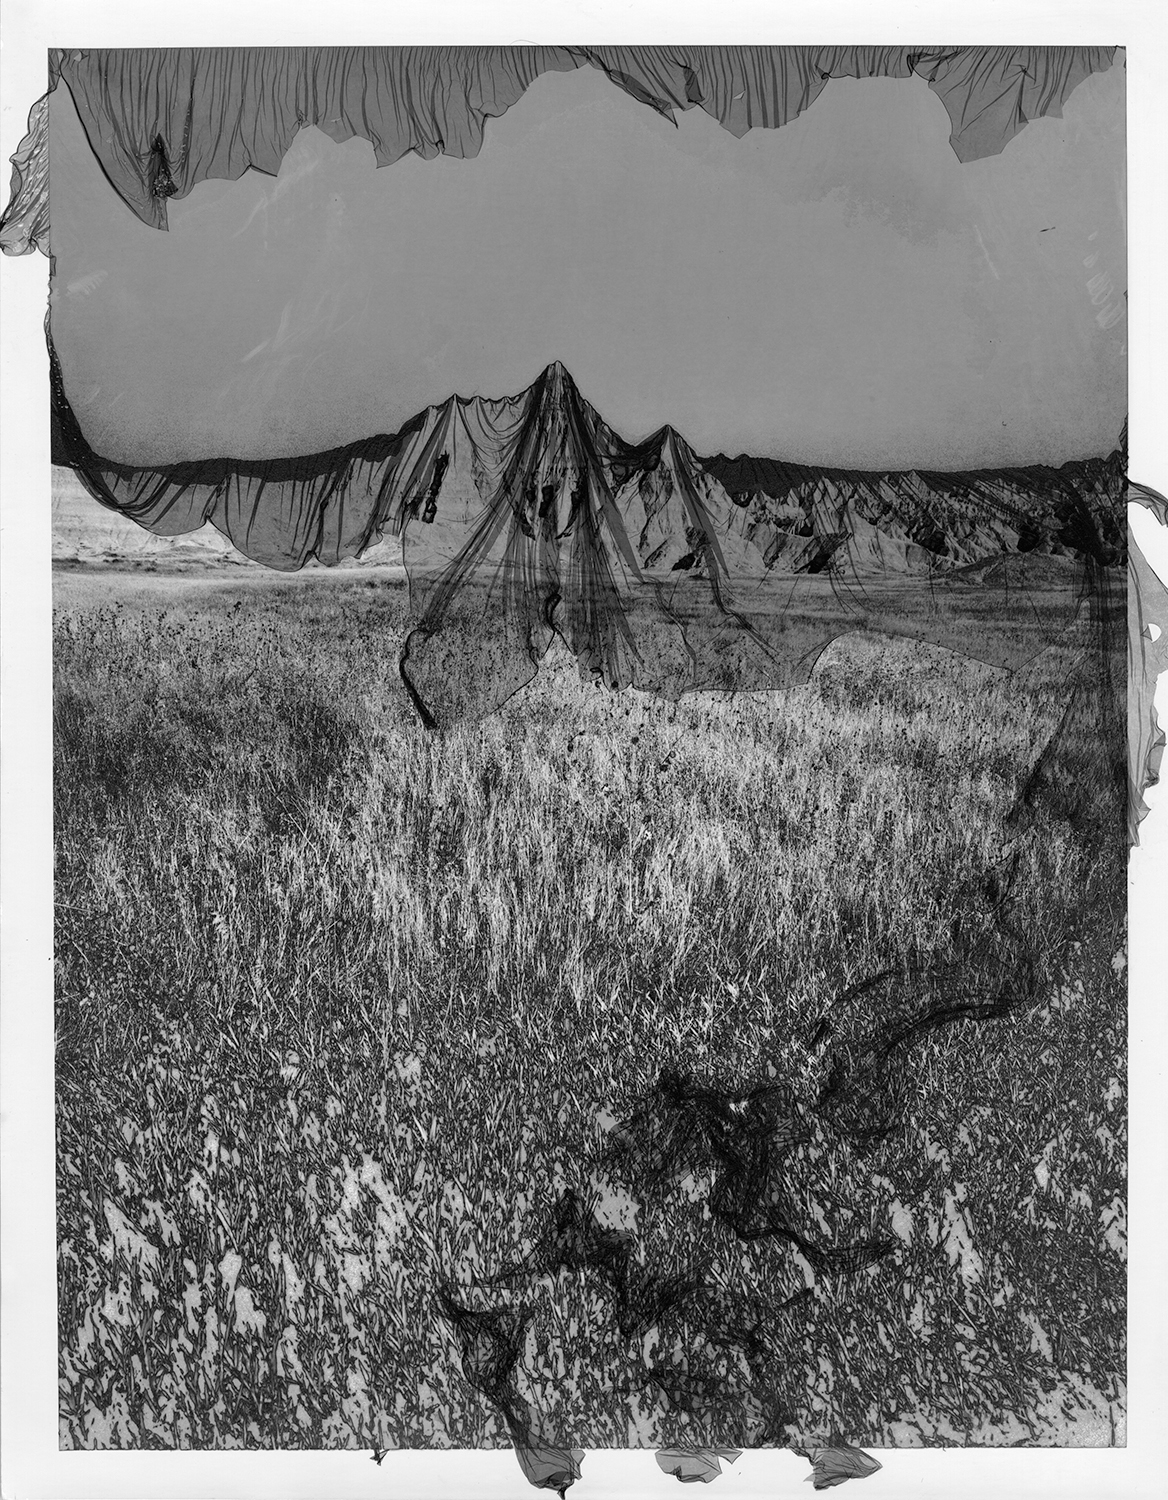
So did I throw away that print? After the last few years of working with this process and realizing much of my work with it is almost like a secret conversation and negotiation between the process and I, I thought about how I could work with the print. I’d dabbled in removing veils in some of my earlier images but never really liked the random texture it created on the print surface. But what if I kept removing it, rubbing it down straight to the paper white? Well, I kept at it, selectively removing any raised bits of emulsion and came up with the print as you see it above. It’s a fitting tribute to this project which discusses the erasure of the natural realm due to climate change, urban sprawl, resource extraction, and failed megaprojects; to have the landscape literally disappear. Coupled with that, the erasure of indigenous culture in the Black Hills of South Dakota through monuments like Mt. Rushmore makes it even more fitting – especially now that legislation is being proposed to add the Orange Menace to this defaced mountain.
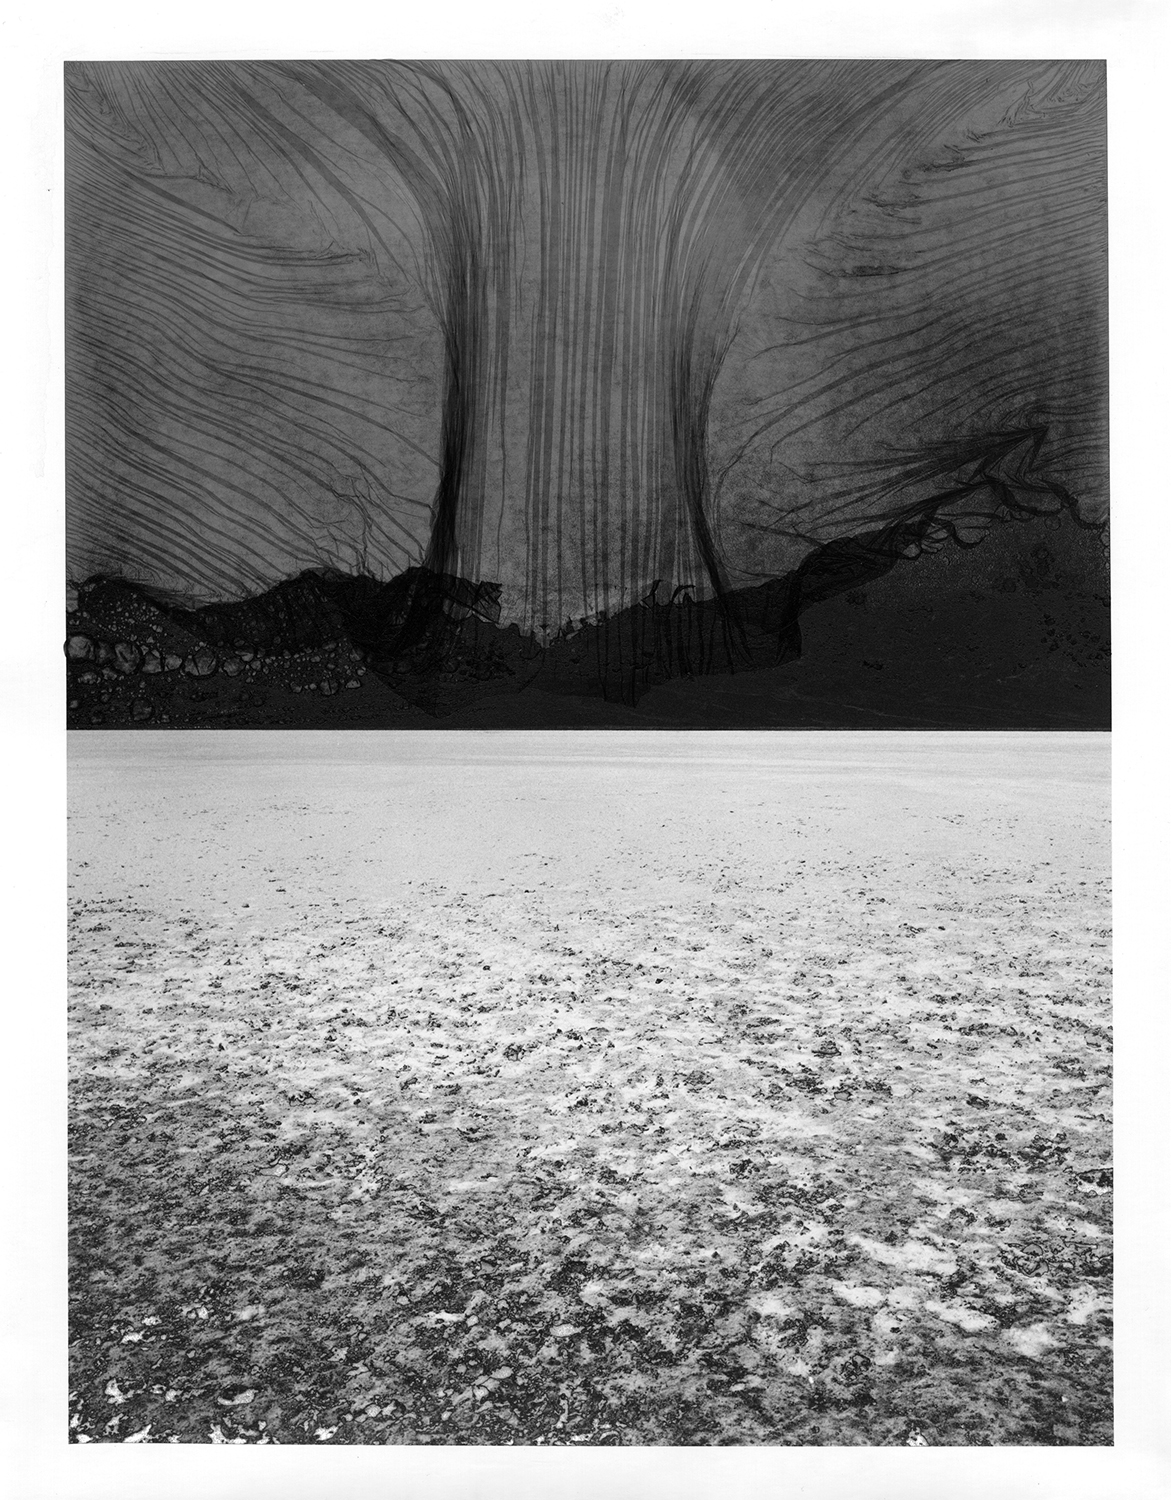
As I continue to extend this project, it’s important to find new and varied ways to gesture with the veils to keep the images fresh in a project that’s maturing and solidifying. There’s only so many times you can look at wavy veils in the darkened, infrared skies and think that each image is unique element within the project. I believe these three new additions to the series show all sorts of different directions I can take this project, now that I’ve grown fairly confident in my basic capabilities with the process. The image directly above was an intentional and directed veil burst done by rolling the print up and creating a funnel in the emulsion layer that would draw any burst downwards toward the center of the print. By elevating the print in the final rinse slowly from a horizontal position to a 60 degree angle, I collected the entire veil in one place before allowing it to burst. As always, there’s still a little magic in the process no matter how much I learn to control it, and the burst out created a gorgeous pattern that likened to a mushroom cloud. Above, the “Badlands” image and its veils burst before I wanted them to, so I collected the pieces of veils floating in the rinse water with a pipette, later redepositing them on the print to suggest the gesture of a veil being pulled off the formations in the background. I spent a lot of time making the pieces look like they had snagged on the grasses, adding a suggestion of a third dimension as the veils also travel outside the print plane.
Looking forward to going back in the darkroom and printing more – creating these is so fun and creates a zen-like experience that I can’t replicate anywhere else.
Came over from your Bluesky link. Really enjoyed your observations and examples. I generally prefer these kinds of experiential trial-and-error descriptions of alternative processes to the more typical “how-to” recitations, especially as errors sometimes yield greater interest!
Thank you! Great to see folks interacting on a different level on Bluesky. I’ve always thought an alt-pro book that visually focused on failures would be really helpful for folks looking to start in it. Most manuals have troubleshooting sections but they’re never visual. What does it look like when you do this or that wrong? What does it look like when you’re almost, but not quite, there?