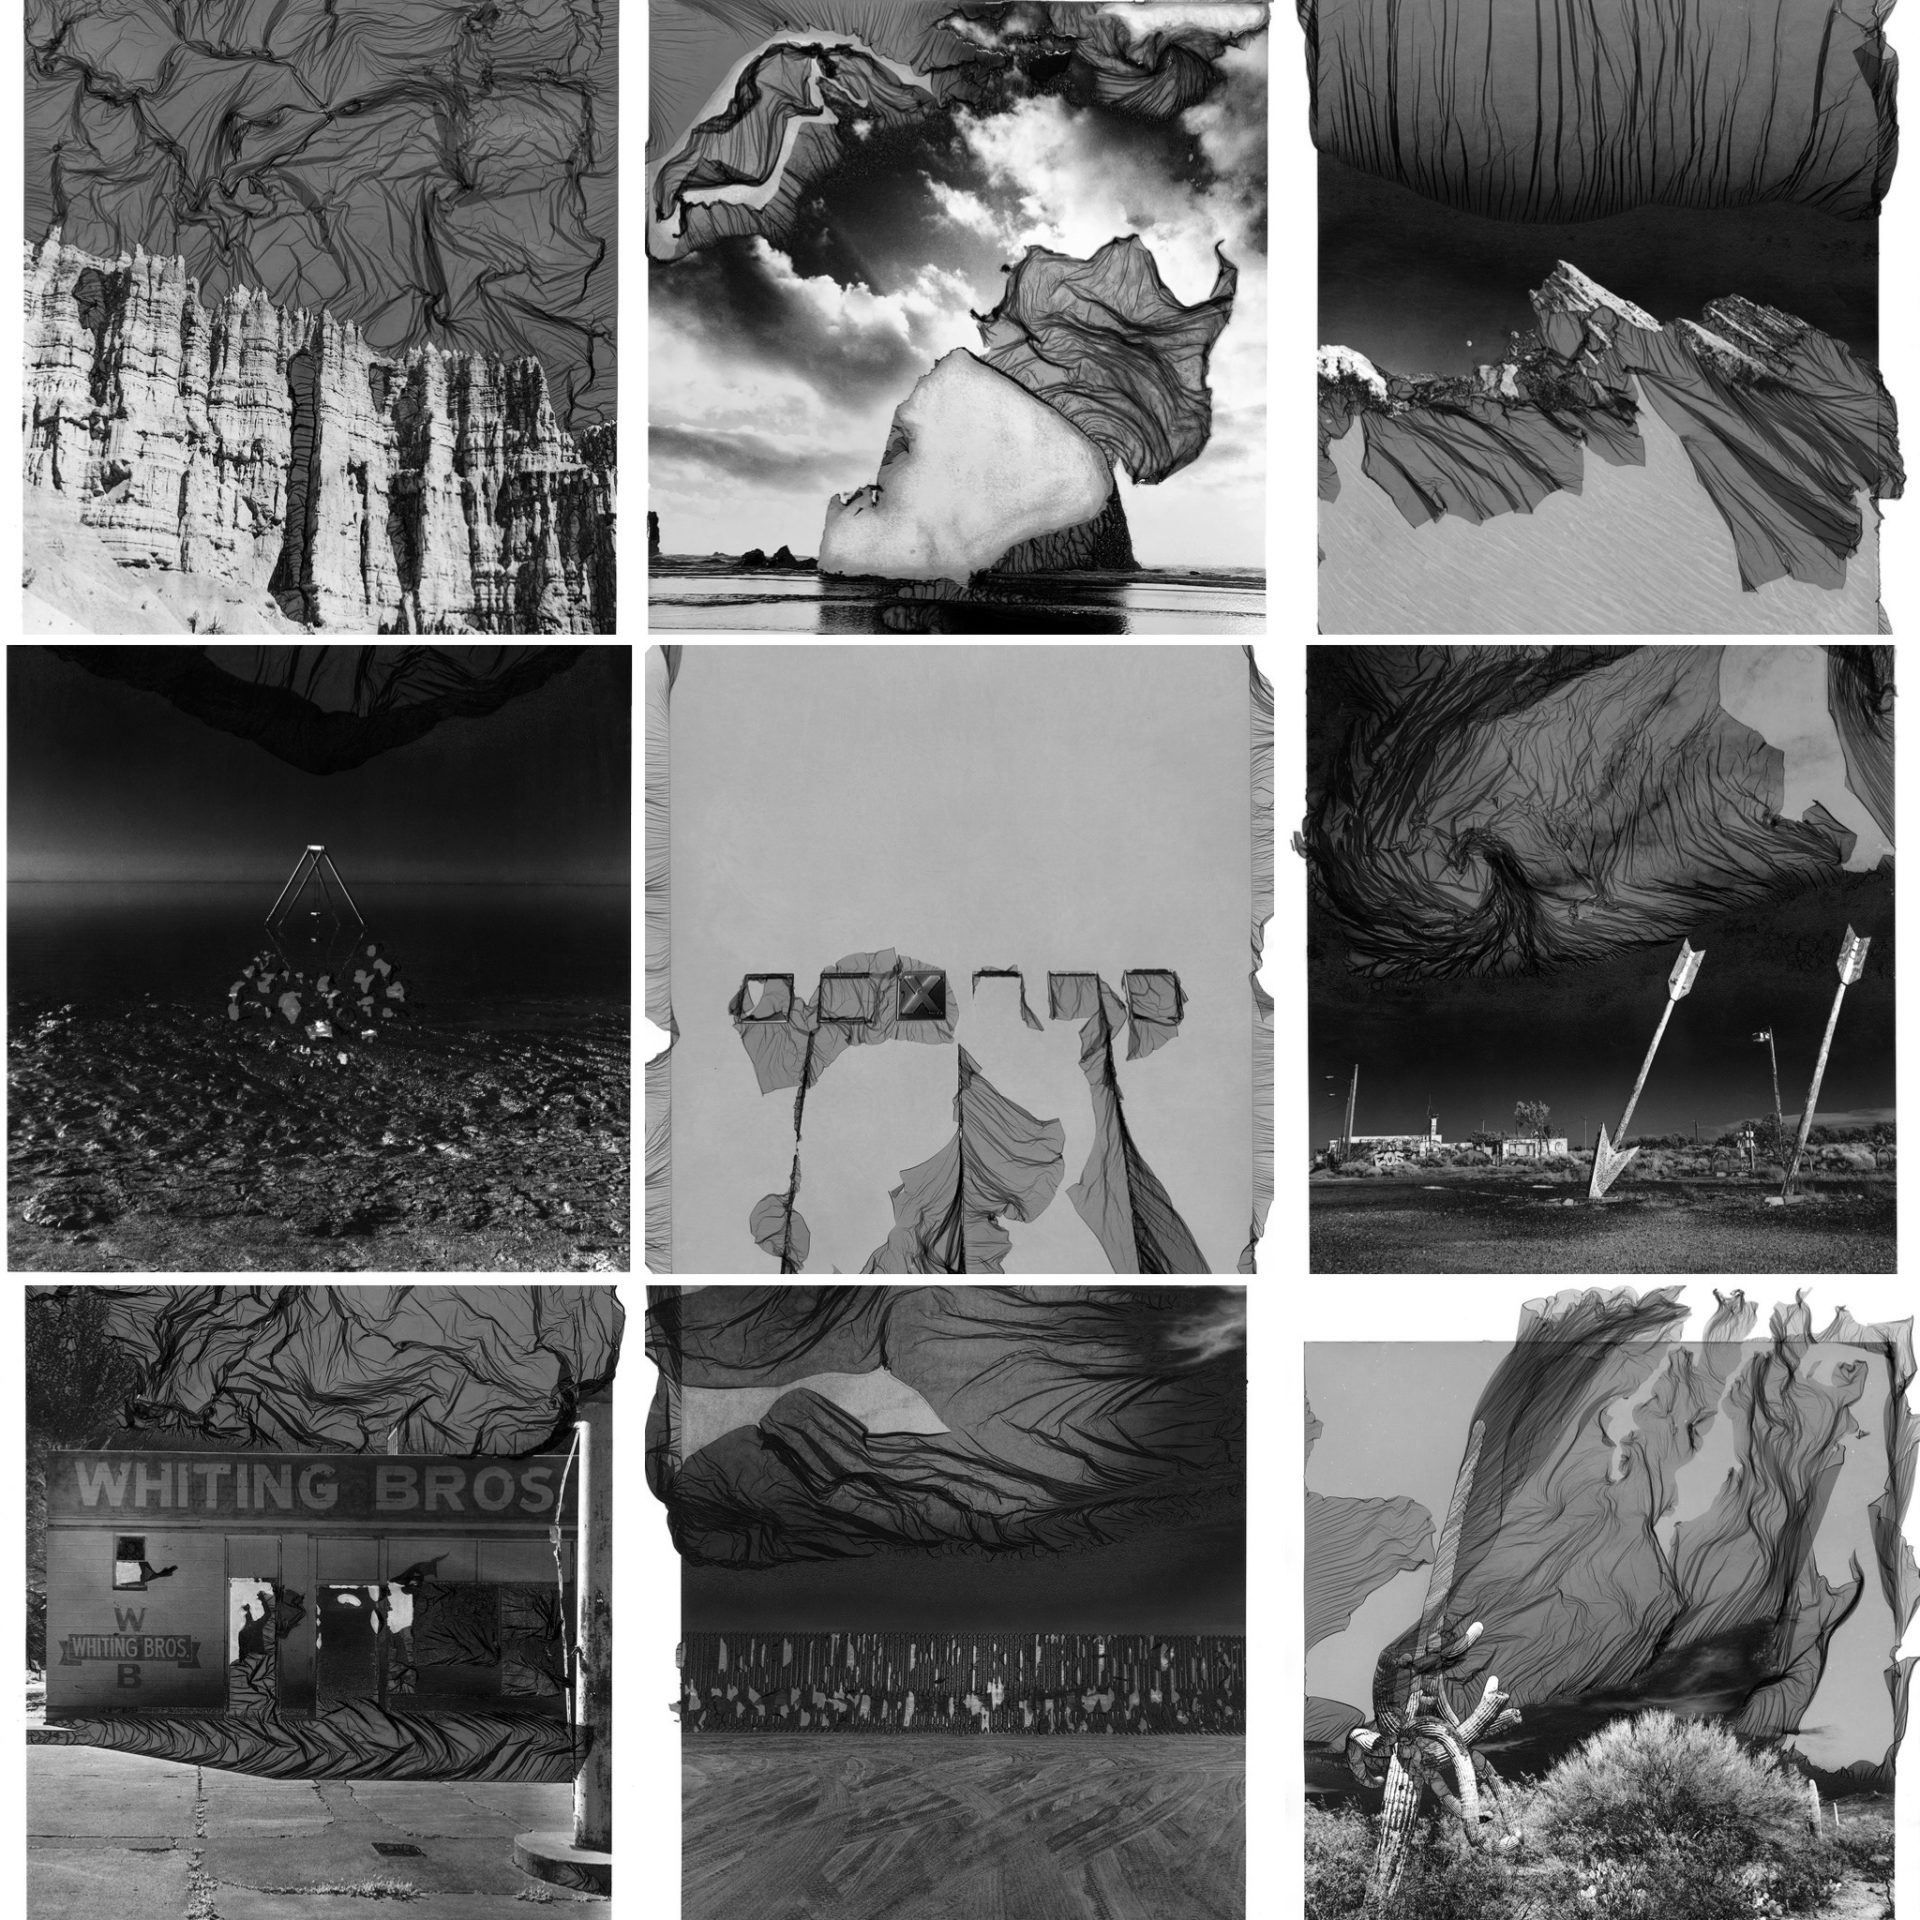
 It’s been three years since I started working seriously with the Mordançage process and while I haven’t been creating them at any breakneck pace, I have learned quite a bit from the twenty-some 11×14 images I’ve created in that time. This process is often written about as a relatively straightforward one that, at worse, is a little time-consuming and has a few additional safety considerations. As with any alternative photographic process, there’s a lot that you learn in the actual process of making prints that is rarely mentioned in those basic how-to instructions, and even the more verbose ones tend to gloss over because a tenured practitioner may consider those potential lessons little more than common sense. Those actively learning alt-pro will likely agree with me here: there is nothing common about the epiphanies you have after a long day struggling in the darkroom. They deserve to be shared! While this does *not* serve as a basic how-to, a safety guide or an all-inclusive, advanced look at the Mordançage process, this is a list of lessons I’ve collected over the past three years that either serve as an addendum , a contrasting opinion, or a not-so-obvious connection to everything I’ve read in both the most basic and advanced instructions on the Mordançage process.
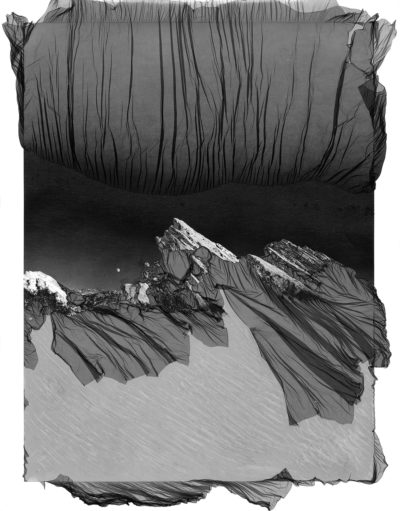
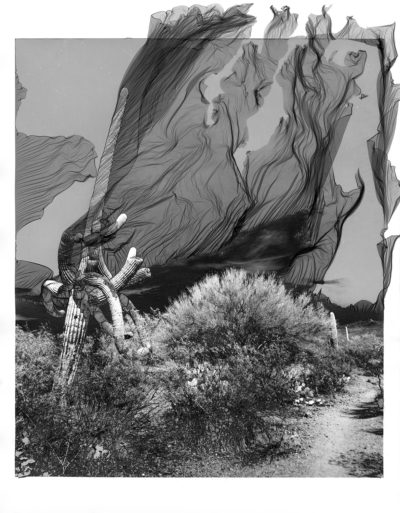
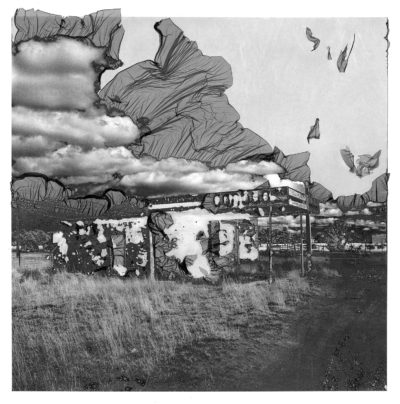
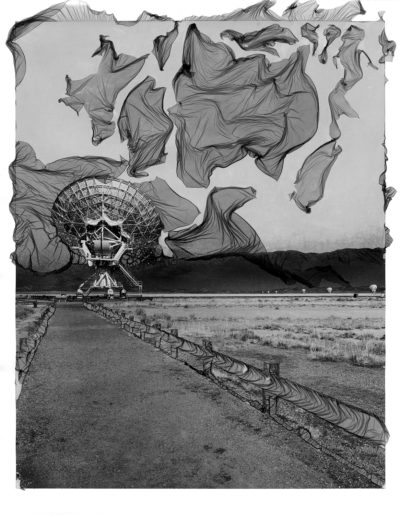
I should probably introduce some elements of my working process before I get much further. I shoot infrared, medium format film and typically print my work at 11×14 on Ilford Multigrade Fiber-based Warmtone Paper. IR provides sufficient areas in the print that are completely black, allowing large veils to easily form. Again, this is NOT a guide to the process nor a discussion of appropriate safety needed for this process – find those elements elsewhere :
- I pre-wet my completed print in 75-85F water for several minutes
- I favor the formula in this article because it requires nearly double the amount of hydrogen peroxide than other formulas do – and it tends to work better and faster with MGFB Warmtone because of that. I keep the print in this solution for ~3 minutes.
- I use 40 volume hydrogen peroxide found at Beauty Supply stores as “Developer” – make sure you get “clear” and not “cream”.
- I wash for 20 minutes prior to placing the print in developer again. I keep this water at 75-85F. Any hotter than 85F and the veils get far too thin to work. My veils tend to not show up until they’re in this wash – there’s some texturing of the deepest blacks while it’s still in the Mordançage solution, but they don’t bubble or veil until the print enters the warm water.
- I use Dektol, water for Stop Bath, and Kodafix. After Kodafix, I wash for five minutes, Permawash for one minute, and then follow it up with a 20-30 minute wash. I try my best not to burst any veils until this point. MGFB Warmtone will build up bulbous, tumor-like veils filled with darkened water and are increasingly difficult to manage as they get bigger. After the print has washed 20-30 minutes, I start puncturing the veils with a needle to slowly drain them of the water. Waiting to do this until this point makes moving the print between various washes harder, but it also reduces how many veils you may lose.
After settling on this process, this is a sampling of the noteworthy observations I’ve had over the last three years:
- A thick plexiglass sheet the size of your print is an absolute necessity as you move the print from tray to tray. After the veils start to form, bending / shifting your print at all can cause the veils to rupture. If you’re like me and you want to wait to manipulate / burst your veils after the entire process is complete, backing your print with a plexiglass sheet allows it to remain rigid as it is transferred from one bath to another.
- A wash tray with a row of small holes drilled into it an inch or so above its bottom is an incredibly helpful tool. This allows the water level to be kept much lower than the lip of the tray, which will keep your print from floating to the top (and also keep those pesky veils from running over the lips, out of the tray and then bursting all over the place!). By having the holes about an inch above the base of the tray, it allows the water to flow just a little above the print on top of your plexiglass sheet. The tray I use also has a hose attached to it, bringing the water in at a sharp right angle, directing the water down and away from the surface of the print. Reducing the amount of ripples in your wash water will definitely help preserve your veils.
-
An example of re-applied emulsion by use of an eyedropper. Some how-tos encourage folks to mix fresh Mordançage solution with every printing session. Others encourage folks to save it for only a couple of weeks, recharging it with a small infusion of hydrogen peroxide to “wake it up”. Neither of these suggestions are suitable for how, and where, I work. I’ve managed to keep the same Mordançage solution for nearly a year by adding 40 volume hydrogen peroxide in 5ml doses until my test strips start to show the necessary texture in the solution and the appropriate bubbling once placed in the warm bath. Keeping the solution this long does have some drawbacks, though – prints tend to not bleach out nearly as much during the process, typically turning a faded sepia tone, but they bounce back the exact same way once they’re put back into developer. This method of recharging your solution works well for me because I’m only mord’ing one print per darkroom session. I tend to take 3-5 hours to complete the entire process listed above, with the bulk of the time invested in draining the veils, manipulating veils, and appropriately cleaning the print. I’ve recently read Christina Z Anderson’s updated Experimental Darkroom and have decided to start recording my pH level of my solution to gauge whether the solution will produce veils.
- I mentioned above that mixing new chemistry each time isn’t practical for me because of where I am. Alaska, like many other places in the world, has pretty restrictive shipping requirements. The Copper Chloride that is necessary for the process can only be mailed 30 grams per package, as per Bostick & Sullivan, one of the few companies I’ve had luck with that are willing to work with me to get the supplies I need. Often, companies give Alaskans a hard “no”. That said, the limited quantities I’m allowed to order per package makes what supplies I have on-hand quite precious, so keeping old solutions useful is quite important to me.
-
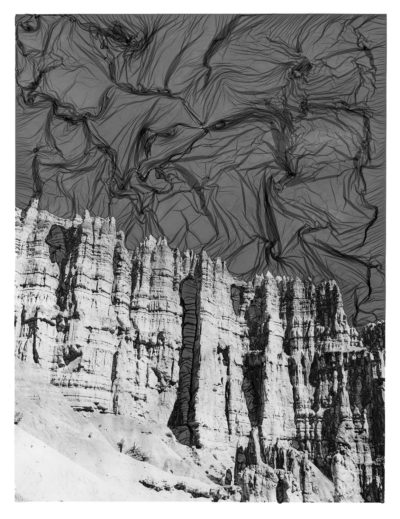
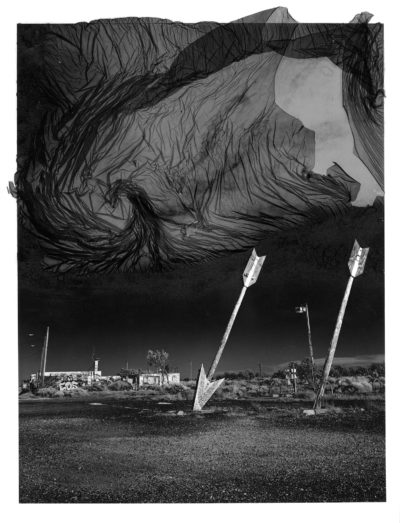
Note the twisting veils in the sky – this is a fan brush used to twirl up the emulsion veil. Different papers react vastly different in the Mordançage solution. I’m sure there’s some alt-pro photographers out there are reading this and quipping back with a “well, obviously”, but where paper choice is an ingrained part of the process in Cyanotype, Van Dyke Brown, Platinum, or any number of other processes where you make your own photographic paper — and in each of these processes it’s quite clear that paper choice can make or break the print — having my traditional darkroom students shift from one paper brand to another, or one finish to another, has never broken the development process. Initially, I regretted starting my explorations into Mordançage with Warmtone MGFB, so I started steering interested students toward Classic, rather than Warmtone. After exhaustive testing by the student and I, we determined that Classic was much more fickle, required a much lower water temperature to create sustainable veils (~70-75 Degrees) and, in the end, still did not provide consistent results. The lesson here: find a paper that works for your particular working process, as changing papers will upend your entire working method.
- If you live in a dry climate, as I do, several lengthy washes for Ilford MGFB, Classic or Warmtone, will end with your print curling up like an ancient scroll. Using a dry mount press to flatten the prints is a pretty standard process, but in extremely dry climates the curled print creates tension points on the edges that can crease the paper if it is flattened. I’ve talked to Ilford about this and they’ve suggested the following solution: re-humidifying the dried print. I’ve found that keeping the print in a humid (>50%) space for 20-30 minutes tends to loosen up the print enough to where the dry mount press won’t crease the baryta surface. Even so, I tend to leave additional space around the edges just in case a minor crease does form.
- I like having some of my veils drape and gesture outside the borders of the print, as it creates a interesting 3D effect and calls attention to the destruction of the print surface. When I was making my first Mord prints, I didn’t think through how this would look when framed and matted, and often didn’t leave enough room to neatly anchor the print to the mat board behind the window mat. Give yourself generous borders if you chose to do this.
- Having the right tools to bleed the blistered veils and to manipulate them afterward is very important. I wait to bleed the veils until the final wash has ended and do so by puncturing a tiny hole in one of the edges of each veil and allowing it to seep out. This is a lengthy process and requires patience, as it may take several hours to bleed all of them appropriately. If I want a veil to be free-flowing from only one side, I flip my sewing needles around and use the dull end against the edge of the veil to release it from the surface of the print. Often, I don’t succeed in wrangling all of my veils until the final wash – some of them rip off and go exploring. A small, plastic eyedropper tool (I use the ones Bostick & Sullivan send out with their solutions) can suck up those errant veils and allow me to re-apply them wherever I want. A small fan brush is my brush of choice to move around veils, as it’s broad shape tends to grab the veil in multiple places gently. Thin-tipped or heavy brushes tend to be a lot more rough and encourage veils to rip.
- Between the paper base and the lifted emulsion layer that forms the veils, there is a sublayer that, through the process of Mordançaging a print, gets kicked up and mixes with the water that gets caught between these two layers. Inky, black and thicker than water, it can very easily stain your borders and the rest of your print if left to dry on the surface. I’m sure someone will fill me in on what this is called in the comments below. I try to drain all of my blistered veils and flush them through a lengthy wash cycle. While I listed above that I keep the prints in that final wash for 20-30 minutes, that prior to manipulation: by the time I’m done with a print, it’s generally been in water for at least two hours. Once *all* the veils have been bled, I use cosmetic makeup wipes to clean the borders and the other non-veiled parts of my prints of any of this inky residue. Even when it is highly diluted, it can still leave residue on your print surface.
- If you peel back a layer of veiled emulsion, you’ll note that the remaining sublayer still attached to the print’s surface can be manipulated. I’ve used cosmetic wipes to rub this sublayer away until it is paper white and I’ve also lightly manipulated it with a brush to suggest movement. Either way, it is very delicate – take your time when manipulating it.
- In the past, I’ve had a student attempt to bleed these veils from the back side of the paper with a needle. While they were successful, they also had small, fractal-like dark stains that crept into the paper. Some seemed to disappear over time, but others, I believe, were permanent.
- Once all veils have been bled, I move the print out of the water and continue to move and manipulate the veils with just a small amount of surface water. As that surface water evaporates, I add more to necessary areas with a small eyedropper.
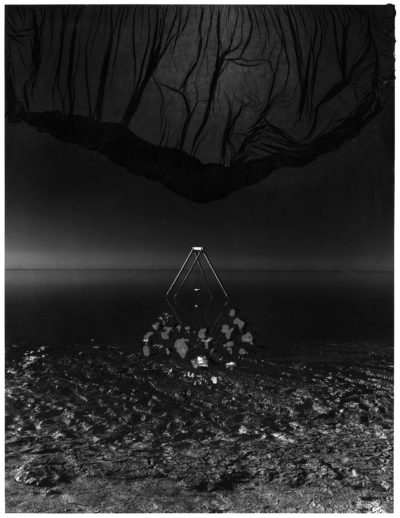
- Sometimes, I will re-submerge part of a print in water by keeping a portion of the print on the edge of the plexiglass and above the surface of the water. This allows the veils to trail off in opposite directions, suggesting all different kinds of motion.
- It’s likely that you will have some small, sand-sized bubbles on your prints that you may want to bleed off in a faster manner. If they’re very small, I’ve made a habit of placing a cosmetic wipe on top of the bubble and applying just a little pressure. All the inky residue is immediately gathered up by the wipe.
- Scan your images at high resolution once they’re dried and flattened. The majority of my prints have not been affected by chemical staining or color alterations over the last three years, but there’s a couple that have. Each time that I find one of my older prints stained due to chemical leeching, I remind myself to be more diligent in washing my prints. Some color shifts are absolutely pleasing – others not so much. Embrace the change, as Mordançage is inherently a destructive process.
- There are at least two camps about preservative spray for Mordançage prints and I’ve probably situated myself in a third camp: the “wait-and-see” camp. I am not denying that I worried quite a bit about sending my first Mordançage originals out to several exhibitions in the Lower 48, but I have yet to see any damage from travel, shifts in humidity, or emulsion flaking. Is it possible? Certainly. But I’ve also heard that there’s things to worry about when it comes to preservative sprays. Perhaps in another three years, I’ll have a better perspective on this. I do not currently preserve my prints. I store them with several layers of glassine between them just in case one leeches chemicals to another layer.
I’m sure that there’s a laundry list of other hints, tips, tricks, and tools that I could come up with – but this is a good start, I think, for those of you interested in getting more involved in the Mordançage process. All of this information is provided as an addendum to other resources out there that actually provides a thorough step-by-step process, safety guide, etc. Take appropriate safety precautions by looking up other guides, reading MSDS forms, and consulting folks that are in the know – this write-up is, again, not a substitute for that. It’s also worth nothing that YMMV on all these suggestions depending on your working method, the paper you use, and your location. I welcome a healthy, cooperative dialogue down below in the comments. I, like anyone working in alt-pro, am always tweaking my workflow, coming up with better practices, and more rigorously testing elements as I get more prints behind me. I’m certain there’s folks that know more than me out there – but these tips are things I’ve found to ease my journey into this exciting and complicated process. My current series featuring this process, known as Western Consumption, can be viewed here.
+There are no comments
Add yours